Printable Gift Tags - Christmas Red

As a newbie blogger it's been pretty challenging finding time to keep up with the blog world.  I have a handful of blogs I love to follow on my phone, a task I picked up when I found myself nursing my sweet baby boy 24/7!!!   It's sad to say but my phone became my best friend and a very important tool to keep me in contact with the outside world.  And while most people are fascinated by movie stars, I have to say that I'm a HUGE fan of these "cookie" ladies: CallyeGlory, and Haniela.

These ladies and I have been through a lot! They don't know this, or me for that matter, but they kept me sane and gave my mind the creative outlet it needed day after day.  Do yourself a favor and check them out!  They are nothing short of amazing!

I'm embarrassed to admit that they post more things on their blogs than I have time to read!   Mind you, these women have kids to feed, hubby's to love, and a whole list of chores to do on top of all the blogging they do.  How do they do it?  Just recently, Callye & Glory, along with a couple other "cookie queens", were featured on a little show called Martha Stewart!!!  I was so excited and proud to hear that these ladies were being recognized for the beautiful work they do.  After all, they deserve it! Congratulations ladies!

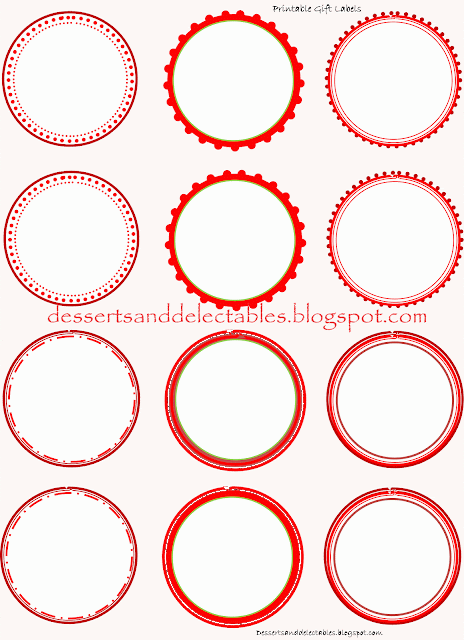
And because these ladies always find a way to give back to their readers, I thought I'd make printable tags for my readers!  Homemade tags are a great way to personalize gifts! 

Download the file here.

PRINT, CUT, and ....

...PASTE.

 Or glue them onto cardstock and finish them off with a pretty ribbon.

Who needs a bag?! Just hang a pretty tag on it and voila!

A sincere and very warm THANK YOU to my readers. May your holidays be filled with joy, love, laughter, and lots of sweets!  

Itty Bitty Balloons Cake


What better way to celebrate a birthday than with balloons and cake!  


Or should I say balloons on a birthday cake?!


This was too pretty not to take a picture...  Vanilla Cake. Homemade Strawberry Preserves.  Strawberry Meringue Buttercream.


This cake would have looked just as cute without the fondant.  The buttercream, made with fresh strawberries, has such a beautiful color and even better taste!  I have to say that it's currently at the top of my  preferred frosting list.... YUM!


Chocolate Thumbprints

Call me simple (my hubby would beg to differ) but one of my all time favorite sweets are cookies.  And I'm not talking about the kind you find on aisle five or your local grocery store.  Yuck.  You have to be crazy to pass up the chocolaty goodness of a freshly baked chocolate chip cookie!  I mean, really?!!!

So what's better than a cookie? A whole lot of cookies of course! So how in the world was I suppose to pass up Martha Stewart's Cookies: The Very Best Treats to Bake and to Share? Lets just say that my husband REALLY loves me and just looked the other way as I put it in our shopping cart.  So after watching it sit for oh, at least one year in my bookshelf, I thought I'd bring it out and make my little boy a sweet treat.  I was hoping to make almond and raspberry thumbprints but I guess you have to have raspberries for that.  Yes, I could have just filled them with raspberry jam but lets just say that I like to complicate my life because when I make sweets, I make it ALL from scratch.  And I didn't have time for all that because I made the mistake of telling my son that I was going to make him cookies.  Big mistake.  As soon as he heard the C word, he started asking for some.  And he wouldn't stop.  So I quickly searched through the refrigerator for healthy snacks to keep him occupied while I made these...


To make CHOCOLATE THUMBPRINTS you will need:

  • 1 c (2 sticks) unsalted butter, room temperature
  • 1 c confectioners' sugar
  • 1/4 tsp salt
  • 2 tsp pure vanilla extract
  • 2 1/2 c all-purpose flour
for the FILLING:
  • 3 tbs unsalted butter, room temperature
  • 3 oz semisweet chocolate, chopped
  • 1 tsp corn syrup
Preheat oven to 350 degrees F.  Line two baking sheets with parchment paper.

How to make the cookies:
Beat butter, confectioners' sugar, salt and vanilla on medium speed until smooth.  Decrease speed to low while adding the flour then increase speed to medium until combined. The dough will look a bit crumbly but not dry.

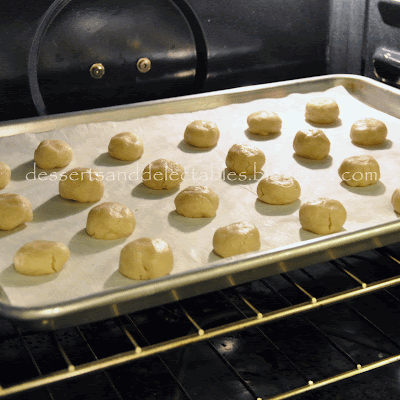
Use 2 teaspoons of dough to form each ball .  I used a tablespoon to gather the dough but a melon baller or small portion scoop would work just as well.  Place balls 1" apart on baking sheets and stick them in your preheated oven.  This recipe yield about 4 dozen cookies.


Bake them for approximately 10 minutes, remove from oven, and for goodness sake DON'T STICK YOUR THUMBS INTO THEM! Yes, you heard right!  You can still call them by their name even though you played it smart and used the round end of a measuring spoon to make the indentation instead of your thumb.  If you don't have measuring spoons.... go buy some!  Okay, you don't have to run to the store to buy measuring spoons.  Look around your kitchen and I'm sure you can find something to use instead of your thumb.  Once you have made wide, deep indentations into the cookies, stick them back in the oven and bake until the edges are light brown, about 8 minutes.  Transfer to a wire rack to cool.


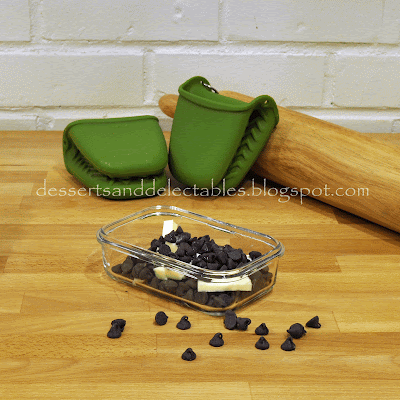
The recipe calls for a heatproof bowl set over a pot of simmering water.  I thought I'd making a little easier...  Combine the chocolate, corn syrup and 3 tbs of butter in a microwaveable dish.  Pop it into the microwave and warm in 30 sec intervals (time will vary from microwave to microwave).  Stir after each interval until filling is melted and smooth.  Allow the filling to cool until it thickens the slightest bit.  This will make it easier to pipe onto the cookies.


Once cookies are completely cool, pipe filling into cookie centers.  If you don't have a piping bag handy, you may use a Ziploc bag with the tip cut off, a candy bottle, or a spoon.  Enjoy once the filling is firm.


 Cookies will keep well for 3 days stored in an airtight container at room temperature.


I took it one step further and sprinkled powdered sugar on my chocolate thumbprints.  Happy Baking!


White Rose Baptism Cake

Last month I was asked if I would be willing to make a baptism cake.  My first thought was 'Yes, of course!'.  And before I even inquired about the design I immediately began picturing how the cake was going to look. This is what I pictured...


Isn't it pretty?  This beautiful communion cake was made by Dawn, a very talented cake decorator I'm happy to call my friend.  She makes some amazing cakes. Don't take my word for it, take a look for yourself.


I was hoping to make something similar but let's just say that my idea was way out of the ballpark!  See...


The customer requested a three tiered cake covered in white fondant with roses, rose petals, a couple of angels, faux pearls, and a fondant drape across the front.  Sounds like quite the baptism cake right?! Well, it was...


Little did I know this little beauty was for the owner of the bakery.  Was I nervous? No, not really.  Did I want to give them my best? Always!  


Although they can be intricate and time consuming, I enjoy making edible flowers.  These roses and rose petals weren't the exception.  I think they make a beautiful addition to any cake.  

Beer Bucket Cake

Growing up I looked after my younger siblings quite a bit.  This may sound funny but looking back I almost feel as a piece of my childhood was spent being a parent.    Don't get me wrong, I am grateful to my mother for raising us the best she knew how, but six children are a handful!  So it is no wonder that I hold my three younger siblings very dear to my heart.  That's not to say that I don't love my older brothers because I do love them very much but there's something about the three younger ones that I can't explain. 

I guess I'm a bit melancholy right now because the youngest of the boys just turned 21!  What!  How is this possible?! It seems like just yesterday he was crawling around in diapers and now he's all grown up.  Bittersweet.


Well because he is now legally able to drink beer, I thought it would be nice to make him a cake with some sort of alcohol decor.  I love when I get the opportunity to make cakes like this....


I had been itching to make edible beer bottles and ice and I finally got my chance!  So, what do you think?  Not too shabby for my first try huh?!  Everyone at the party thought they were real beer bottles!  I was just as surprised to see the expressions on their faces as they were to hear that I handmade them.  I guess they do look pretty cold and drinkable.  Take a look for yourself.  


Happy 21st Birthday little bro.

At the Bakery

I recently started helping out at a Mexican Bakery.  They want me to be their cake decorator but I don't know if I have time for such a HUGE commitment.  You see, if I commit to this position, I'd really be committing to being the head pastry chef because in reality, that is exactly what they need (along with a cup or two of good management and a pound of quality control).  Which sounds good and all but, you may want to sit down for this, Custom Cakes Take A Lot More Time To Make Then We Take To Eat Them!  Did this not come as a surprise?  I guess what I'm really trying to say is, I don't have a lot of free time.  Although, I must say that this is the perfect opportunity to do what I love.  I'll keep you posted but for now, enjoy a couple of the cakes I've helped decorate so far.


Ladybug Birthday Cake


Polka Dots and Stripes Baby Shower Cake


Wedding Cake 

UPDATE: I'm not helping at this bakery but I'm still doing what I love!  Everything seems to be falling into place.  It's been quite the blessing that things turned out the way they have.

Pretty Blue Waves

Sometimes my favorite cakes are the ones with the least bit of detail. I made this cake for a dear friend's birthday. I have a hard time coming up with "male friendly" cakes but this one fits him well because he loves Hawaii. And what does Hawaii have a lot of? Ocean, of course! It made sense to me and that's all that mattered. HA! The piping work represents the ocean's waves and I couldn't resist putting a little bit of "sand" to represent the seashore.


Don't you think the graduated layers of blue look pretty? One of my favorite blogs posted a gorgeous pink ombre (fancy name for graduated colors) swirl cake here. That Glory is a talented lady. I'm really loving the look and I can't wait to try this technique on the inside of a cake!


This cake looks cute without any fanfare.


But the fondant crab and sea star are ADORABLE, if I may say so myself! And because I like it so much, here's a closer look at the sea star.

My Little Cowboy Turns One


HOWDY...
This is my baby.  He is our pride and joy!  Isn't he ADORABLE! I sure think so (and because it's my blog, I can boost all I want, he he)!   And as I get all teary eyed because he's growing too quickly please enjoy some pictures from his first birthday.


Each cowboy and cowgirl received a hat, handkerchief, and badge.  That PEPSI crate was one of my favorite props.  I was lucky to find it along with the gingham paper at Pottery Barn on a "camping" trip with my boys. I filled the cones with popcorn but they would have been equally cute filled with shelled peanuts or old fashion candy. 


I think I was more excited than the kids about the favor buckets.  Can you blame me? Weren't they cute?  

The birthday boy with his proud parents.  Oh, and the cake!


These wood rounds worked great as stands for the desserts.


I'm a little obsessed with bunting banners and so I made a couple...  Okay I made a LOT of bunting banners!  What was great about making them myself was being able to use the same fabric to make tablecloths and covers for hay stacks.  


This is the part where I would normally talk about all the cool games we had but the games sort of slipped my mind...oops. Now I have to figure out what to do with all the prizes.  It's my first child, I'm sure I'll get it down eventually, right?!?  But I didn't forget the pinatas! 


And the cartoon artist was so much fun!


 Thank you to all our wonderful friends and family for being a part of our little guy's celebration! Yee-haw!


Topsy Turvy Cake

When we moved into our current home, the idea was to live in a neighborhood where we felt comfortable raising a family.  Little did we know that this new home came with a pair of caring, down to earth, and all around great neighbors!  So when their eldest daughter asked me if I could make a cake for their 25th wedding anniversary I jumped at the opportunity.  Here was my chance to do something for the people who often gave us handy maintenance advice and who have came to the rescue multiple times when something went wrong with our air conditioning unit (in the middle of a heatwave).  Needless to say, we are VERY grateful to our neighbor friends.  

About the bride and groom...
She loves to quilt.  He loves his Dos XX beer.  They both love their palm trees!  So it was no surprise that their daughters wanted to incorporate these items into the cake.  The girls picked the design elements from other cakes they liked and this is what we came up with....


Oh, did I mention that this was my first attempt at a topsy turvy cake! Don't worry, I had disclosed this information to the girls before hand.  I don't know what I was thinking at the time (or anytime for that matter) but I thought it would be fun to hand make all the decorations (what can I say, I'm an overachiever) and although the palm trees, '25', and beads turned out great, I didn't quite have time to make a bottle (okay so I'm a little unrealistic at times).  Did I mention this was my first time making a TOPSY TURVY cake!?!? Yes, I was a nervous wreck but I think we were all pleased with the results.

It was such a great event.  Their daughters were able to book the same venue where their original wedding reception was held twenty five years ago. It was wonderful to see the tears of joy rolling down her face and a look of disbelief as they walked in to see their closest friends and family together for this joyous occasion.  It was an intimate event and I was honored to be a part of such a memorable occasion. Happy 25th Anniversary Mr. and Mrs. Copplin!